Inhaltsverzeichnis
Mehrere IP-Adressen mit DHCP
One computer, one network card, two or more IP addresses
For those who want to learn more about networking, I prepared a special material today. It is intended to provide advanced knowledge about a special TCP/IP configuration. How would you configure your TCP/IP connection to use both DHCP obtained IP and a static IP at the same time?
I am talking about setting up your network card to use more IP addresses at the same time on a single NIC adaptor. What is the utility of this special tweak configuration?
There may be more, but one crosses my mind right now: in case someone has more hostnames, he can configure them to use different IP addresses on the network connection, therefore the Internet connection will be shared between the hostnames.
No additional network card and separate Internet connection would be needed for each hostname.
Setting the connection to obtain the DHCP provided IP
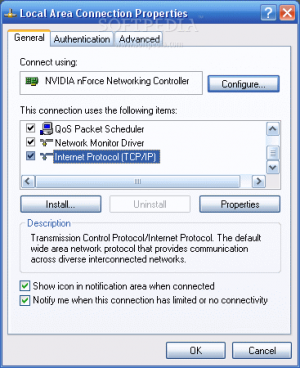
To setup the connection in order to automatically obtain the IP address from the DHCP, you need to right click on the Local Area Connection and to select Properties. Under the General tab go to Internet protocol (TCP/IP) and select properties.
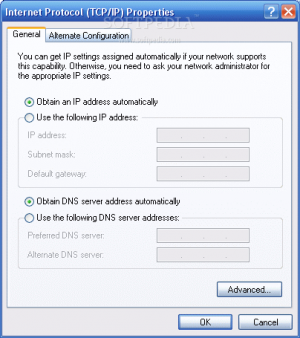
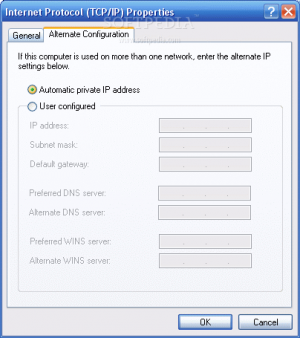
The options „Obtain IP address automatically“ and „Obtain DNS server addresses automatically“ must be selected. Under the next tab, „Alternate Configuration“, „Automatic private IP address“ must be also selected. With these settings you ensure that your computer obtains the IP address from the DHCP server.
Adding more static IP addresses
Next step consists in the operation of adding another static IP addresses (not provided by the DHCP server). Because from Windows there is no option to offer you the freedom to add more IP addresses that can be used in the same time, we need to do a little trick editing the registry.
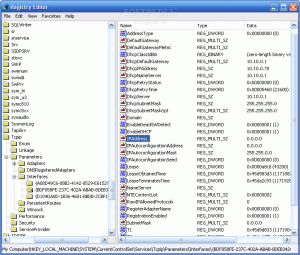
Open the registry editor (Go to Start > Run and type Regedit) and look for the following path:
HKEY_LOCAL_MACHINE>SYSTEM>CurrentControlSet>Services>Tcpip>Parameters>Interfaces
Here you will find a key look like this: {BDF058FE-237C-402A-ABAB-8DEB342026BC}. It is the one that represents the NIC card. You need to look for the one representing your own network card.
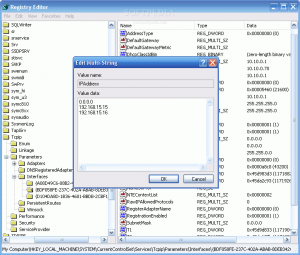
Once you found it, select it and in the right panel, look for IPAddress key. Double click on it and you will get the Edit Multi-String window with a value of 0.0.0.0. Under this value, just add your static IP. You can add one, two or more IP addresses according to your needs.
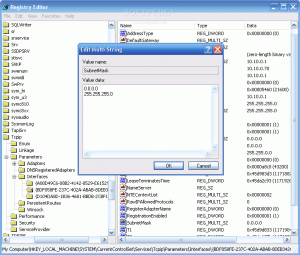
In the same right panel, look for the SubnetMask key. This key needs to be edited in the same way we did with the key above.
Now close the Registry editor and disable the network connection by right clicking on the tray icon. Re-enable the connection again and you are done.
